Installing plasterboard using PU adhesive foam

Bonding plasterboard with PU adhesive foam is an efficient and practical method for constructing or renovating interior walls. This how-to guide explores the benefits of drywalling and plasterboard installation, with recommended techniques and step-by-step instructions for using PU adhesive foam. Whether you're a professional or a DIY enthusiast, these tips will help you achieve excellent results.


Soudal Soudabond Easy, Soudabond Plasterboard and Trade Plasterboard PU Foam Adhesive range

Why use PU Adhesive to glue plasterboard?

PU adhesive foam replaces the need for traditional mortar-based adhesives when installing plasterboard panels. The ready to use single-component adhesive negates the need for mixing, avoiding any unnecessary mess.

The quick and easy solution saves time, effort and money. The 600ml Genius Gun canister can bond an area up to 9m2, which is the equivalent of a 20kg bag of powder adhesive. Soudal offers this product in both Genius Gun and Gun Grade.

Benefits of Gluing Plasterboard

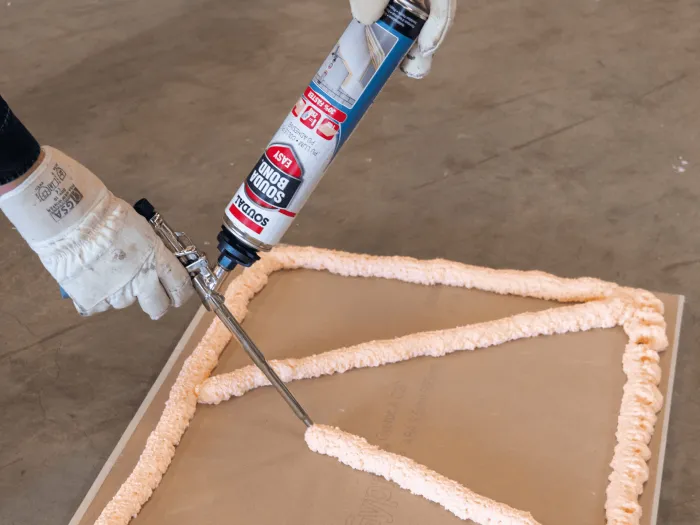
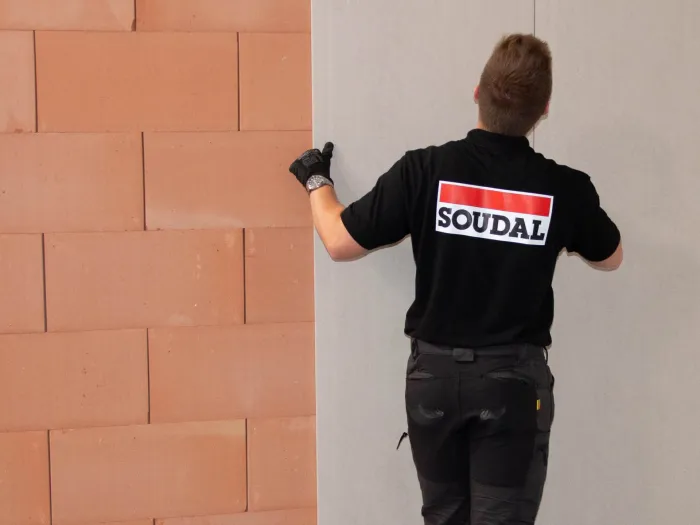
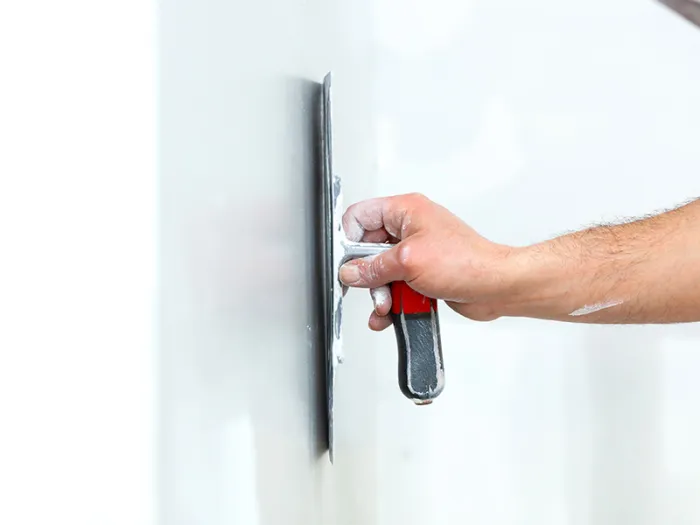
Soundproofing

Plasterboard helps reduce sound transmission, making it a practical and affordable solution for noise control. 12.5mm sheets dampen noise effectively, however for more demanding needs we recommended thicker, or specialized, soundproofing.

Thermal Insulation

Plasterboard significantly improves energy efficiency. When used in suspended ceilings, it minimizes heat loss and reduces energy bills. Ceiling installations typically involve mounting drywall on a wooden or metal framework rather than direct gluing.

Consult an electrician for proper lighting placement and wiring before installation. Combining plasterboard with thermal insulation materials enhances its effectiveness, offering a cost-efficient solution for maintaining indoor comfort.

Faster Renovation

Plasterboard installation using PU adhesive foam eliminates the drying/waiting time associated with traditional bonding methods (e.g. Dot & Dab). Soudal plasterboard adhesive foam is workable within 1 hour, enabling work to continue much faster. Making it perfect for time-sensitive projects. Always refer to the technical data sheet to ensure suitability of plasterboard adhesive foam for your application.

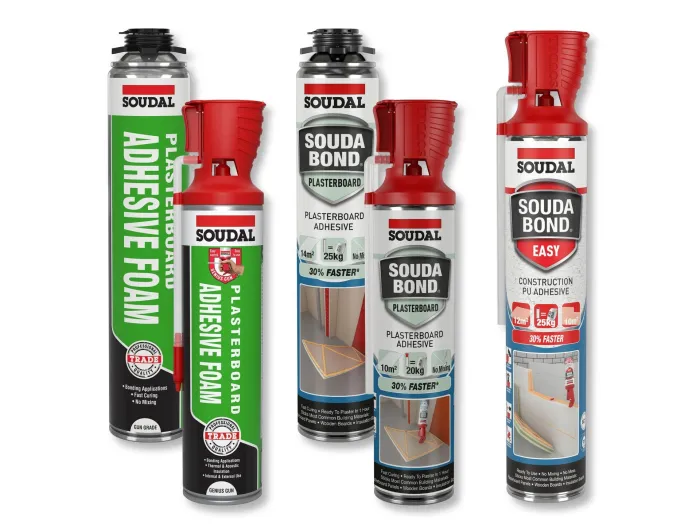
Benefits of Adhesive Foam

  • Reduces mess and clean-up efforts (saving time) - ready to use, no mixing required
  • Easier to apply than mortar-based adhesives.
  • Fast curing, allowing for work to continue faster than with traditional mortar-based adhesives
  • Adheres to a most common building materials, including concrete, brick, and wood.
  • Cost-saving
PU Adhesive foam benefits when gluing plasterboard

Step-by-Step Instructions for Bonding Plasterboard


Preparing a brick wall for the use of Soudal PU Adhesive foam to glue plasterboard

1. Wall Surface Preparation

Proper surface preparation is critical to ensuring a durable bond:

  • Inspect and Repair: Check for structural damage, cracks, or holes, and address them before continuing.
  • Clean the Wall: Dirt, dust, and debris can weaken an adhesives strength, remove to ensure a smooth clean surface.
  • Apply Primer: Use a water-based primer applied with a brush or roller. Allow it to dry completely (8-12 hours) before proceeding. Primer enhances surface tension and improves adhesion.
Cutting plasterboard to fit during application of pu foam for use in installing plasterboard

2. Measuring and Cutting Plasterboard Sheets

  • Measure and Trim: Cut plasterboard sheets 15 mm shorter than the wall height to allow for expansion gaps at the ceiling and floor. Use a utility knife and straightedge for precise cuts.
  • Plan for Openings: Pre-cut spaces for electrical outlets, switches, and cables. Double-check measurements to ensure proper alignment.
  • Clean Surfaces: Wipe both the wall and plasterboard sheets to remove dust or debris before applying adhesive.
Soudabond Easy Plasterboard Application

3. Applying Adhesive Foam

  • Safety First: Always wear gloves and goggles while working with adhesive foam. Ensure adequate ventilation to minimize exposure to fumes.
  • Dampen: Slightly dampen all surfaces in preparation for foam - a damp surface helps with adhesion as well as faster curing times .
  • Dispense Foam: Apply adhesive foam 3 cm from the edges of the sheet and in a zigzag pattern across the centre. This ensures even distribution and secure bonding.
  • Test Adhesion: Wait 5 minutes and test the foam’s readiness. The adhesive should be tacky and stick slightly to your glove.
Installing plasterboard when using adhesive, Soudal PU adhesive foam

4. Installing and Curing Times

  • Press the plasterboard sheet firmly against the wall, using a straightedge or spirit level to maintain alignment and prevent warping.
  • Ensure proper ventilation during the curing process to avoid condensation or waterlogging. Keep the area at a stable temperature and humidity level.
  • Soudal plasterboard adhesives are workable in an hour. Adhesive foams fully cure within 24 hours, providing a strong and reliable bond.
Finishing after installing plasterboard panels with pu adhesive foam

5. Filling and Finishing

  • Reinforce Seams: Apply joint reinforcement scrim tape along all seams to prevent cracking and enhance durability.
  • Final Preparation: Plaster the full surface of the wall. Clean thoroughly before painting or wallpapering.

Special Considerations for Old Walls

Preparing and Applying to Older Walls

Adhesive foam products, such as Soudabond Easy or Soudabond Plasterboard, work just as effectively on older surfaces when properly prepared. 

Older walls often present challenges such as dampness or structural integrity and bonding plasterboard directly onto untreated old walls can cause issues like peeling and poor adhesion. To prevent this, proper wall preparation is crucial. Follow these steps to prepare them properly:

  • Evaluate Structural Integrity: Repair any significant structural issues before beginning. Seek professional advice if needed.
  • Remove Loose Material: Scrape away peeling plaster or damaged sections to expose a stable surface. Use a wire brush for thorough cleaning.
  • Temperature and Moisture: Ensure the wall and plasterboard sheets are at least +10°C, with an ambient temperature of +20°C. Use a moisture-resistant sealant for damp-prone walls before priming.

When applying plasterboard using PU adhesive foam, follow the same installation steps as for new walls, ensuring that the surface is clean and primed. For added stability on uneven or compromised walls, consider using mechanical fasteners alongside adhesive foam.